As, we think, the majority of you, We have high canisters, boxes etc and smaller containers, packets and containers for which I keep spaghetti, rice and a multitude of other things.
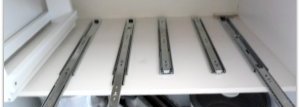
Remaining image:We built our little sliders making use of the preceding the following:
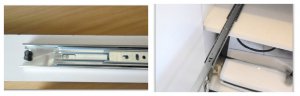
- Sliding mechanisms
- Double Sided White Melamine (left-over from earlier jobs)
- Iron-on side tape for the open wood
- Screws appropriate lumber
- vinyl Screw caps (instead of pic)
- 1 x Handle per slider (not on pic)
***As all cabinets differ in sizes I'm not giving any sizes, but from images you need to get an idea of what and just how we performed this***
Right picture: The arrow suggests where iron-on pieces must get - all open bits of lumber
 On remaining could be the part of the sliding process which goes onto the bottom regarding the slider / On right the process has already been fastened towards bottom of the pantry - whenever ready the top piece slides into the bottom piece - there's slightly stopper which are provided with this procedure.
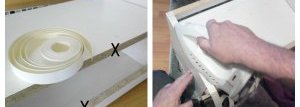
Another image of in which part strip is needed (suggested by the X) to full cover up the available lumber / Roy utilizes a standard clothes metal to secure it on the wood {It will be VERY dirty afterwards, but wipes clean easily using a little dish washing liquid}
All of the sliding components into place - we utilized one for every single of this little part sliders as well as 2 the larger sliders in the middle. (the tiny slider - regarding far left - had been set up) The pieces that are taken down is showing you how they actually works - they are the edges that are fastened to your bottom of the sliders.
 Set up, handles added and all screws neatly saved under synthetic screw hats.
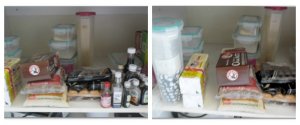
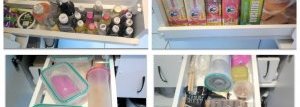
The utmost effective two photographs reveals small sliders today packed and will slip to the rear of the case - and I also is able to see everything instantly
Ditto utilizing the bottom two sliders - only bigger and packed how I like it!
The aforementioned picture reveals the things I packed (to see effortlessly) when you look at the bottom part associated with the bigger sliders - Note the little place into the image regarding the right.. I regularly keep all my synthetic wraps, wax and baking report, in addition to all my various kinds of meal and freezer paper in a synthetic bin - Well, today I'm able to locate them much quicker in addition to plastic bin is certainly not becoming relocated from counter to counter, as I actually had nowhere else to place it.
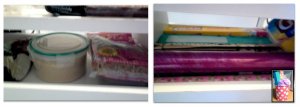
An OPEN and a CLOSED image - I like that, it seems therefore neat {Actually that is the first thing my son, Dimitri said earlier, when he saw it fully installed..}
A last picture of the BEFORE and also the AFTER !!
Share this Post
latest post
-
 Home automation system Cost July 9, 2026
 -
 Genesis Home Appliances June 19, 2026
 -
 Home Depot appliances financing May 30, 2026
 -
 Berlin Consumer Electronics Show May 10, 2026
 -
 Home Appliances Service April 20, 2026
 -
 Apple home automation Systems March 31, 2026
 -
 Consumer Electronics Cary NC March 11, 2026
 -
 Used Appliance Recycling February 19, 2026
 -
 Home automation Images January 30, 2026
porular posts
-
 Home automation Ottawa November 30, 2016
 -
 Consumer and Electronics Show October 16, 2016
 -
 Small Spaces Kitchen Appliances September 6, 2016
 -
 Raspberry Pi Home automation June 28, 2016
 -
 IFA Consumer Electronics Show December 20, 2016
 -
 When is Consumer Electronics Show September 16, 2016